Living in Belgium I recently switched from Telenet as Internet Service Provider to Proximus. Proximus offers fiber optic internet where I live, whereas Telenet only has coax. In Belgium, when the cable guy comes to install the Internet connection the provider also offers a Wi-Fi router to provide the in-home connectivity.
The Wi-Fi router offered for fiber Internet connections with Proximus is a device that can only be configured through the Proximus customer website. This is probably OK for most customers but suboptimal for me. The router that comes with the Internet line is also quite junky and its shape isn't very convenient.
In Belgium one is not required to use the Internet provider's modem or router. A customer should be able to use their own hardware.
So I went and bought the Netgear Nighthawk RS300, a Wi-Fi 7 router. Maybe I was naive in thinking it would be a better router than any of the Chinese companies offering similar products... but that was part of why I chose Netgear.
My naïveté was soon confirmed because setting up the router was hell. Netgear wants you to use the Nighthawk app for iOS or Android. This app expects you to connect to the default Wi-Fi network the router emits... and then it checks for an active ethernet connection on its WAN port... and waits until it gets an IP.
If it does not get an IP... the setup process is a dead end. There is no way to get past this step in the app. You are effectively stuck. The app is of no use anymore.
But I wasn't planning on using the Nighthawk iOS app anyway. I looked online and found that the webserver of the router runs on 192.168.1.1. Going there in a browser I was able to log in with the default username (admin) and password (password).
Once you are logged in click on the tab "Advanced" on top.
Expand "Advanced Setup".
Select "VLAN / Bridge Settings".
Check "Enable VLAN / Bridge group"
Select "By VLAN tag group".
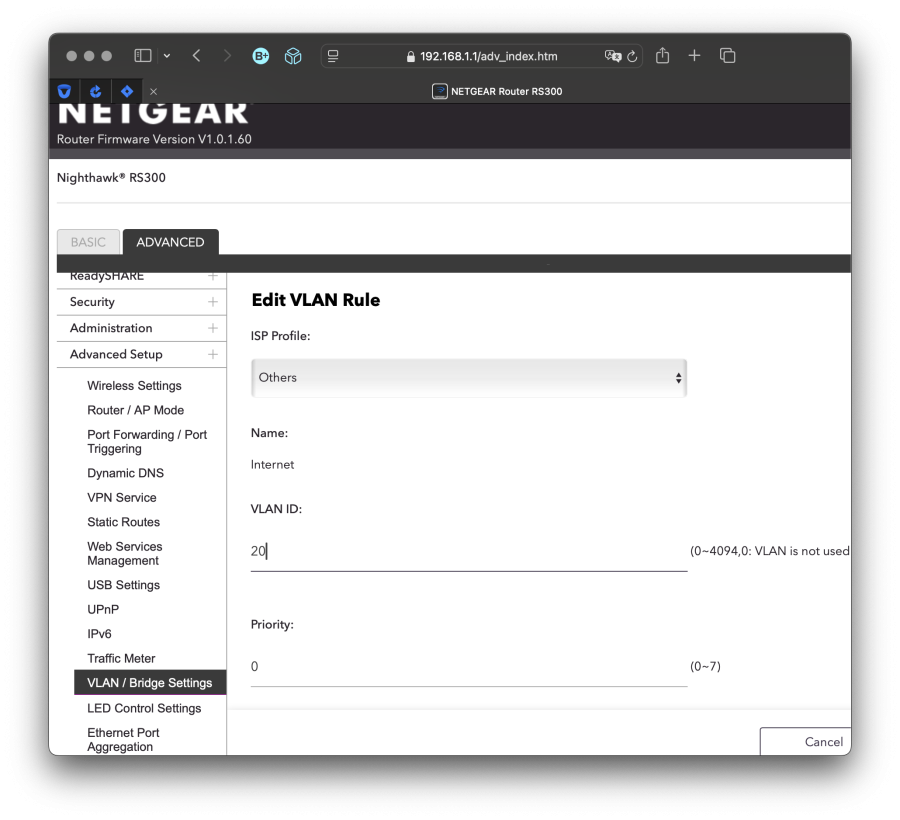
Select the default "Internet" group and click "Edit", or create a new one if there is no default one.
Set the VLAN ID to 20 and click "Apply". VLAN tag 20 is what the Proximus Optical Network Terminal uses.
Click "Apply" again on the main VLAN / Bridge Settings page and the router should pick up the changes.
The Internet connection light on the router changed from orange to white and we were connected.
After it got connected the router checked for firmware updates and wanted to install V1.0.1.60. After the update it rebooted but it came back up without a Wi-Fi network. Not the default NETGEAR87, not the one I had already changed it into... There was no Wi-Fi network anymore and no more way to connect to it over Wi-Fi. Make of that what you wish but I had to insert a pin into the reset hole on the back of the router to reset it to factory settings and change the admin password, change the Wi-Fi name, and do the VLAN tagging setup again... before it _actually_ worked.
That was two hours of frustration laying on the floor in our entrance hallway... all because the Nighthawk app gets stuck when it is connected to something that does not do DHCP.